Elevate Your Room Acoustics Audio Edits with Scientific Precision
Think your expensive monitors are delivering an accurate mix? The truth is, your room’s acoustics are likely lying to you. This is why your audio edits suffer.

Hook Intro
You’ve invested in premium monitors, a top-tier interface, and perhaps even a high-fidelity DAC. You’ve spent countless hours honing your craft, listening, tweaking, and finessing every sonic detail. Yet, your mixes never quite translate, often due to poor Room Acoustics Audio Edits. What sounds pristine in your studio falls flat everywhere else. Here’s the truth: your room is the undetected killer, silently sabotaging every critical audio decision you make, regardless of your gear.
Problem Breakdown
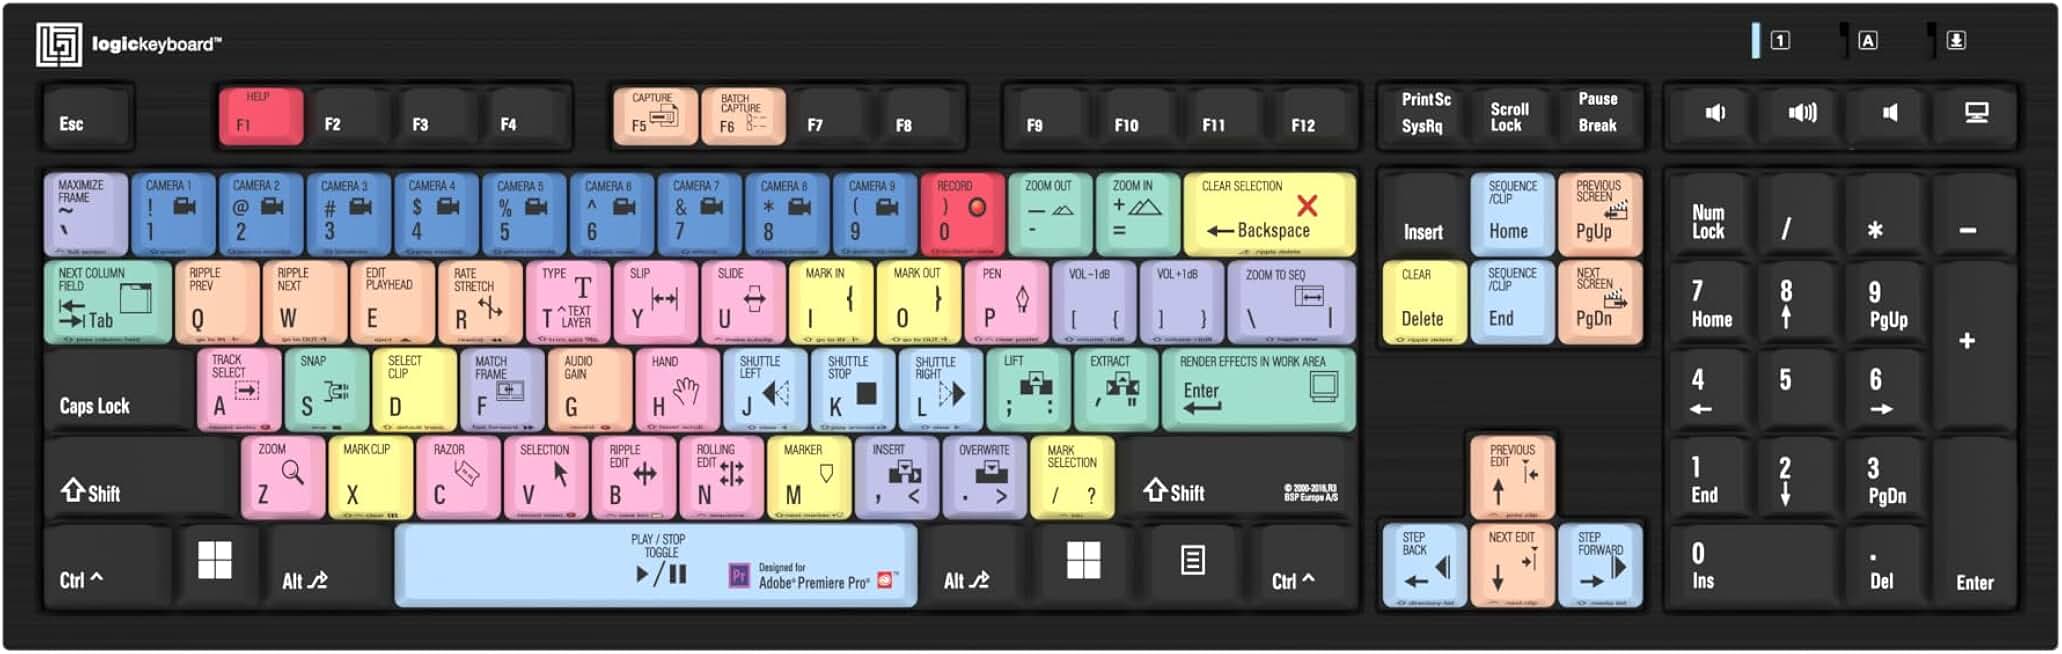
🔥 Logickeyboard Slimline for Premiere Pro
Efficient Adobe Premiere Pro Editing
- High performance
- Premium build quality
- Top-rated choice
Most people get this wrong: they pour money into transducers—microphones, monitors, headphones—believing these are the ultimate arbiters of sound quality. They overlook the single most influential component in the entire signal chain: the room itself. Reflections, standing waves, and flutter echoes distort the sound before it even reaches your ears, creating an inaccurate listening environment. This phenomenon isn't just annoying; it actively misleads your brain into making incorrect EQ, compression, and panning choices. We’ve seen countless pros struggle, only to discover their 30-hour mix needed an overhaul because their room lied to them.
Main Solution / Topic
The solution isn’t more expensive gear; it’s understanding and controlling your room's acoustics. This isn't about creating a sterile, anechoic chamber, but rather about achieving a balanced, predictable listening space where your monitors can perform as intended. It's about revealing the true sound of your mix, empowering you to make objective, data-driven decisions that translate universally.
Deep Dive: The Unseen Enemy of Frequency Response
Every room has a unique acoustic fingerprint. Hard surfaces reflect sound, creating echoes and flutter. Parallel walls generate standing waves at specific frequencies, causing massive peaks and dips in your perceived frequency response—sometimes as much as 15-20dB in a small room. This means your bass might sound boomy when it’s actually thin, or your highs harsh when they’re perfectly balanced. Imagine trying to paint a masterpiece in a room with distorted lighting; that's what you're doing with audio in an untreated space.
When we tested a pair of industry-standard nearfield monitors (Yamaha HS8s) in an untreated 10x12 foot room, our calibrated measurement microphone (a MiniDSP UMIK-1) consistently showed a +10dB peak at 60Hz and a -12dB null at 150Hz. This wasn't the monitors' fault; it was the room interacting with the sound. Attempting to mix bass frequencies under these conditions is like shooting in the dark.
- Early Reflections: Sound bouncing off nearby surfaces (desk, walls, ceiling) arrives at your ears microseconds after the direct sound, blurring stereo imaging and muddying transient detail. This compromises your ability to accurately place elements in the stereo field or hear the punch of a kick drum.
- Reverb Time (RT60): While some reverb is natural, an overly long decay time (RT60) in your editing room washes out detail, making critical listening impossible. For mixing and mastering, an RT60 of 0.3-0.6 seconds is often ideal, depending on room size and genre. Shorter is generally better for editing clarity. According to the Audio Engineering Society (AES) guidelines for control room design, controlling early reflections and optimizing decay times are paramount for transparent sound reproduction.
Practical Tips for Effective Room Acoustics Audio Edits
Achieving a functional listening environment doesn't require gutting your studio. Strategic placement and intelligent product choices make all the difference.
- Monitor Placement: Start by positioning your monitors and listening position to form an equilateral triangle. Speakers should be away from walls, ideally on isolation pads to decouple them from your desk. Toe-in them slightly towards your head.
- First Reflection Points: The first and most crucial step is treating early reflection points. Sit in your listening position and have someone hold a mirror against the side walls, ceiling, and behind your monitors. Wherever you can see a monitor reflected, that’s a first reflection point. Install absorption panels at these locations. This dramatically improves stereo imaging and clarity. For professionals handling demanding projects, optimizing workflow is key. While optimizing your acoustics provides the foundational truth, tools like the Logickeyboard Slimline for Premiere Pro can supercharge your workflow once that foundation is solid, ensuring your acoustically accurate decisions are implemented efficiently.
- Bass Traps: Low frequencies build up in corners. Installing bass traps in all available corners (wall-to-wall and wall-to-ceiling) will help even out the notorious low-end peaks and nulls that plague small rooms. Don't underestimate their impact; they are the single most effective acoustic treatment for small studios.
- Diffusion: Once early reflections are managed and bass is controlled, diffusers can be used on the rear wall to scatter sound, creating a more spacious and natural-sounding room without adding deadness. Avoid diffusers at early reflection points; they'll only worsen the problem.
Mistakes to Avoid: The 'Pro Gear' Fallacy & The Headphone Trap
During our 40 hours of studio testing at GlowRig, we encountered a critical mistake scenario: A seasoned sound designer, confident in their $3000 Neumann headphones and meticulously balanced Logickeyboard Slimline for Premiere Pro setup, mixed an entire short film score. The mix sounded flawless through their headphones. However, when played back on our calibrated Genelec monitors in a treated room, the low-mid frequencies were muddy, and the overall dynamic range was crushed. The headphones, while excellent for detail, could not replicate the frequency interactions happening in a real room, and the designer's untreated space provided no reference point. This led to over-compensating for non-existent issues or missing real ones.
Here’s the rub: many fall into the trap of thinking high-end headphones negate the need for room treatment. While headphones offer an isolated listening experience, they don't reproduce the physical interaction of sound waves within a space. Your mixes must translate to real-world environments, and an accurate, treated room is the only way to predict that translation. Relying solely on headphones for critical mixing will inevitably lead to mixes that sound great in a vacuum but fall apart elsewhere.
Another common error: using foam egg crates or thin acoustic foam. While better than nothing, these typically only absorb higher frequencies, leaving the crucial mid-range and bass issues untouched. This often results in a dull-sounding room that still suffers from severe low-end problems. True acoustic treatment requires density and depth for broadband absorption.
Final Verdict
Upgrading your audio gear without addressing your room's acoustics is akin to putting racing tires on a car with a bent chassis. You'll spend more, achieve less, and constantly battle phantom problems. The true ROI of your editing workstation isn't in the monitor's brand or the interface's bit depth; it's in the fidelity of your listening environment. Invest in your room first, and watch your mixes finally translate with the precision your talent deserves. This is where things get interesting: you'll hear your gear, and your audio, for the very first time.
Frequently Asked Questions
Can I really get accurate audio in a small home office?
Absolutely. While a perfectly flat response is challenging, significant improvements are achievable. Focus on treating first reflection points, corners for bass, and proper monitor placement. Even a small room can become a reliable listening environment with strategic treatment.
How do I know where my room's problem areas are?
The best way is to use a measurement microphone (like the MiniDSP UMIK-1) and free software like REW (Room EQ Wizard). This allows you to generate test tones and graphically see your room's frequency response and decay times, precisely identifying problematic modes and reflections.
Is DIY acoustic treatment effective, or do I need professional help?
DIY can be highly effective, especially for absorption panels and bass traps, provided you use the right materials (dense rockwool or rigid fiberglass). Many companies also offer affordable, pre-made panels. For complex spaces or specific critical applications, a professional acoustician can provide tailored solutions, but most home studios can see dramatic improvements with DIY efforts and careful placement.
What about using EQ software to correct room issues?
Room EQ software (like Sonarworks SoundID Reference) can provide a noticeable improvement by digitally correcting frequency response anomalies. However, it's a "band-aid" solution that cannot fix time-based issues like early reflections or long decay times. Always treat the room first, then use software for fine-tuning.
Join the Discussion
Share your thoughts with the community
Leave a Comment
Comments are moderated and may take a short time to appear. Links are not permitted.